
- Home
- Deceptions
- Solar
- Thermal Audit
- Ventilation
- Sensors
- Governance
- Environment
- Reference
- Contact
- News
Using an EKM smart kWh meter to monitor 220V circuits (North America)
This is a guide to installing an EKM brand smart kWh meter to monitor a 220V load. The photos are of a standard Thomas Edison vintage, residential power distribution system where the 220V consists of two 110V legs and a neutral center tap that is grounded (Canada and USA). You will likely have this installed by an electrician who will do things differently based on local electrical code, but the connections will be the same. If you have no idea about electrical panels or are unsure how to disconnect your power -- then absolutely do not do this by yourself.
In the diagram below, we show two donut shaped current transformers around the incoming 110V phases. The yellow arrows correspond with the arrows on the transformers. Each transformer has a pair of black and white wires. The purpose of this is to induce a voltage that is proportional to the current flow through the wire that is threaded through the donut.
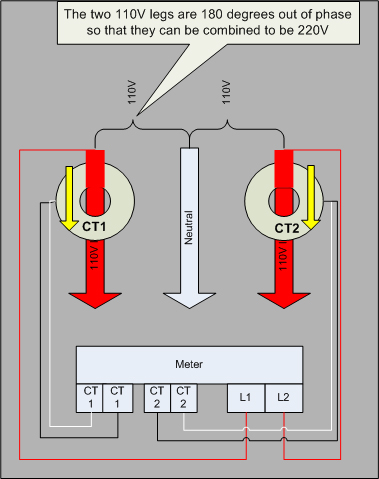
However, to determine the energy consumption, we also need to know the voltage. This cannot be determined from the voltage of the current transformer, because that voltage is a proxy for current. Therefore, and additional pair of wires must be connected to the meter. This meter also uses these connections to power itself (otherwise it would have no power when there was no current) as well as calculating the power factor.
The next photo is of a Siemens electrical sub-panel, somewhat distorted by the camera's fish eye lens. The very large black and red wires at the top are the 110V legs which we are arbitrarily calling line 1 and line 2. The white wire to the right is the neutral.
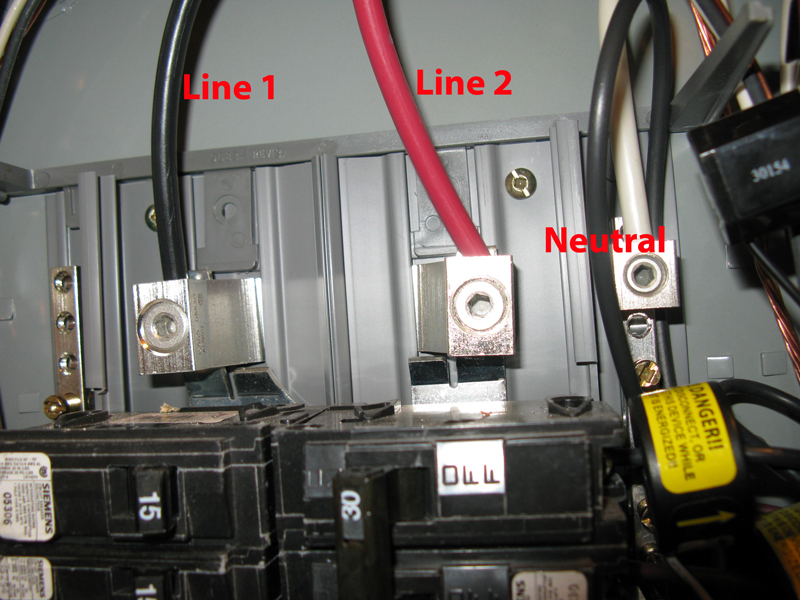
The circuit breakers at the bottom of the photo snap onto the bus bars, and depending on their position in the panel, are either between the neutral and the red wire or the neutral and the white wire. 220V circuits such as water tanks, air conditioners, ovens, stoves and baseboard heaters are twice the thickness and are designed to skip the net ural and connect to two 110V phases (red and black).
If you were to monitor all the circuits, you would want to connect the current transformers to the red and black wires at the top of the photo above. Obviously, if you use the donut variety, you have to undo the hex screw and free the wire, and thread it through the transformer. If you use the snap-on variety, you don't have to disconnect. The donut variety are more accurate but the snap together variety might save you having you to get the power company to disconnect your service so that you can safely disconnect things.
For this example, we are going to measure an individual circuit (a hot water tank) rather than the entire panel. Look at the next photo as a reference:
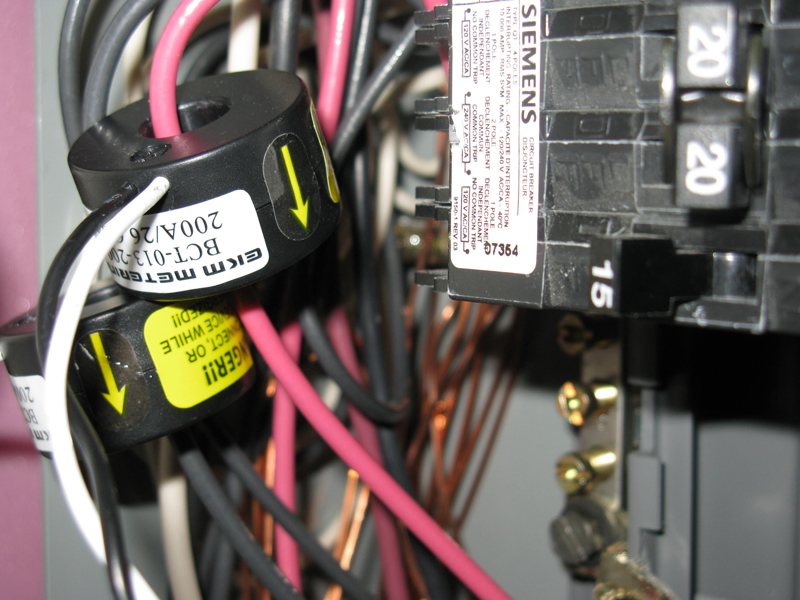
You will see two transformers (donut shaped) with yellow arrows. One is around a red wire, the other is around a black wire. Both the red and black wires are screwed onto the terminals of a 20A 220V Siemens breaker. This breaker is actually a combo unit that has two 110V breakers and one 220V breaker. The transformers were slid up close together for the photo, but would normally be slid down and tucked into a less crowed part of the panel.
The next part is trickier. An additional 220V circuit breaker can provide the L2/L2 (power) line for the meter, however, the phases must be matched. For example, let's assume that the transformer that is connected to the red wire in the photo above is connected to the meter as CT1 (current transformer 1). You then have to insure that the wire from the extra 220V breaker attached to L1 (line one on the meter) is on the same phase. In other words, the CT1 transformer and L1 need to connect to the same very large (red or black) wire shown in the top of the first photo.
If you get the phases mixed up, nothing with explode. However, the meter has a register called 02 that displays reverse current (as in selling energy to the power company), and it will incorrectly increment. In other words, you will confuse the meter.
The meter below is hooked up and working correctly.
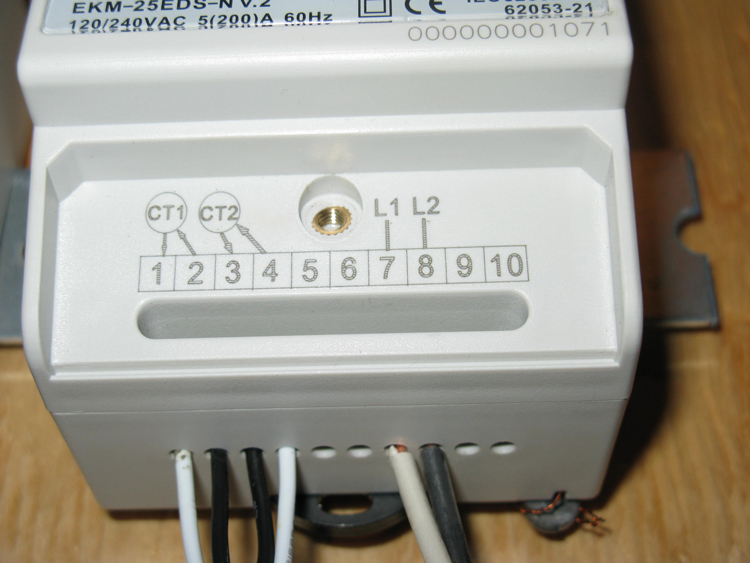
Note that the pairs of wires on the bottom left are mirror images. We could have also had one transformer pointing towards the breaker and one away from the breaker so that the wiring order was white/black/white/black, but for consistency pointed both towards the load. Also note that the wire pair on the bottom right is a 14 gauge wire going to a dedicated 220V circuit breaker. This is overkill -- it could have also just plugged into a 220V outlet like an appliance. The current draw is negligible. The white wire on the right most pair is the same wire that has a transformer connected as the left most pair (e.g. CT1 pair is around L1,and CT2 pair is around L2).
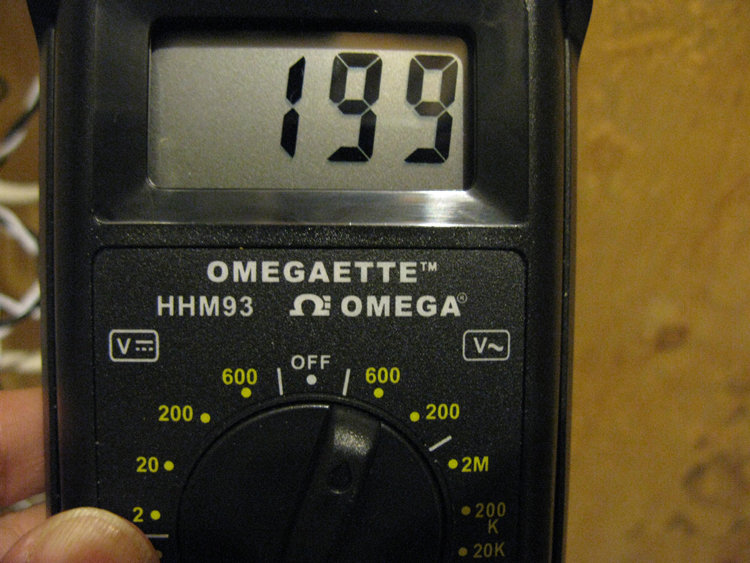
If you turn on the load and don't have the wires from the current transformers connected to the kWh meter, you can get fairly high voltages on the current transformer wires -- enough for a shock. The meter below is showing 199 volts, generated by the 20A of current from the water tank. 199 volts is a nasty shock. Also, current transformers will often buzz loudly when they are left open circuted (not connected to a load like a meter) which would damage them over time. If you hear a significant buzzing sound, recheck the wires where they attach to the meter's terminal block (terminals 1 through 4).
Be careful and hook up everything before you turn the power back on. These transformer wires are rather small to be clamped as they exit the panel so you will have to slide over a piece of insulation jacket (stolen from a piece of Romex perhaps). Check your electrical codes to see how they want you to handle this.
When you are finished, you should get the following readings - each is displayed for a few seconds before moving onto the next:
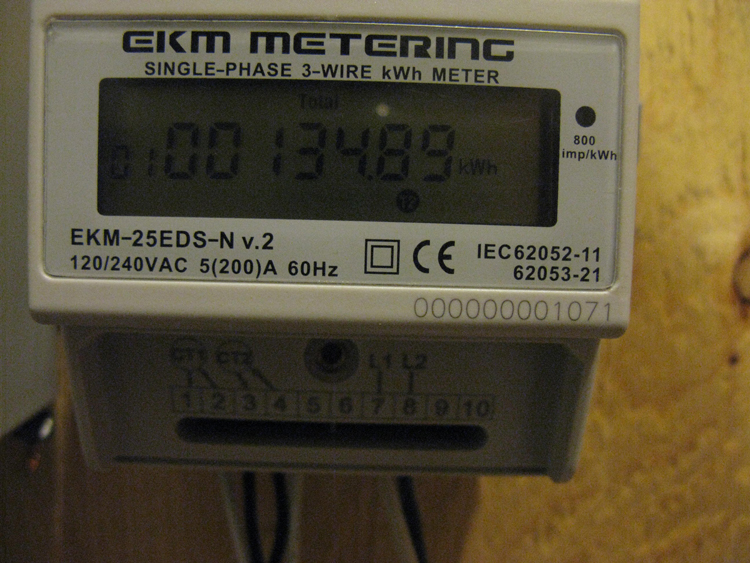
Register 01 - Total Forward kWh
This is the total energy consumed in the forward direction. If there is a load of significance (like a hot water tank), the red led will be flashing every second or so and you will see the decimal portion of the kWh value increment on every cycle through the seven registers.
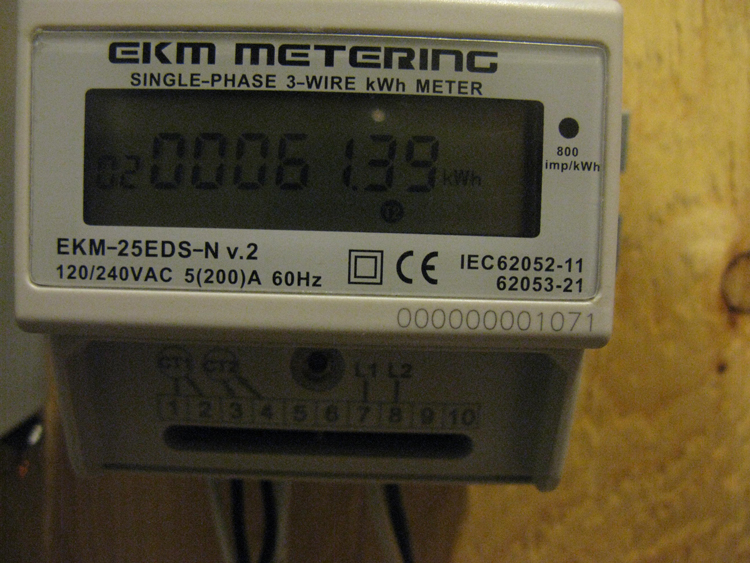
Register 02 - Reverse kWh
This is the total energy consumed in the reverse direction. This should not be incrementing unless you have a grid connected solar/wind system. If it is incrementing, you have either reversed one of the transformer black/white wire pairs where they attached to the meter, ignored the arrow on the transformer, or reversed the L1/L2 connection so that it doesn't match the transformer phases. Again, CT1 and L1 need to be monitoring the same phase.
Register 03 Voltage across terminals L1/L2
This should be about 240 volts. The red light is a pulse indicator that just happened to flash during the camera exposure.

Register 04 Current in Amps
Here we have 23.8 Amps being drawing by a small General Electric hot water tank. The breaker is 20A and has never tripped.

Register 05 Real power in Watts
Watts = (Amps * Voltage * Power Factor). This is a '3000W' hot water tank. The capital P is for Power.

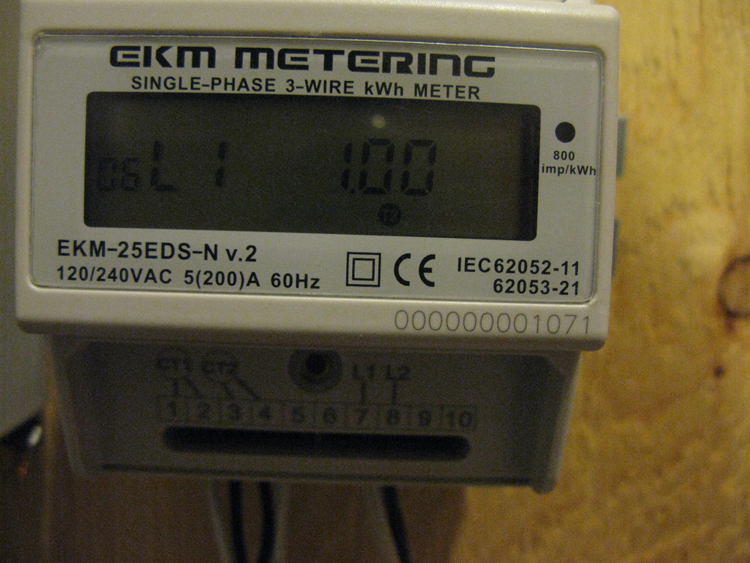
Register 06 - Power Factor
This is the power factor of Line 1. When there is no load, it will read zero. Under load, it will likely read 1.00. All resistive loads (stove, hot water tank, baseboard heaters) have a power factor of 1. Electric motors will have a factor less than one. All it means is that the current will be higher than you expected from basic V=IR math if the factor is less than one. It has no effect on kWh consumed or what you pay unless you are a commercial customer that is penalized for a low power factor.
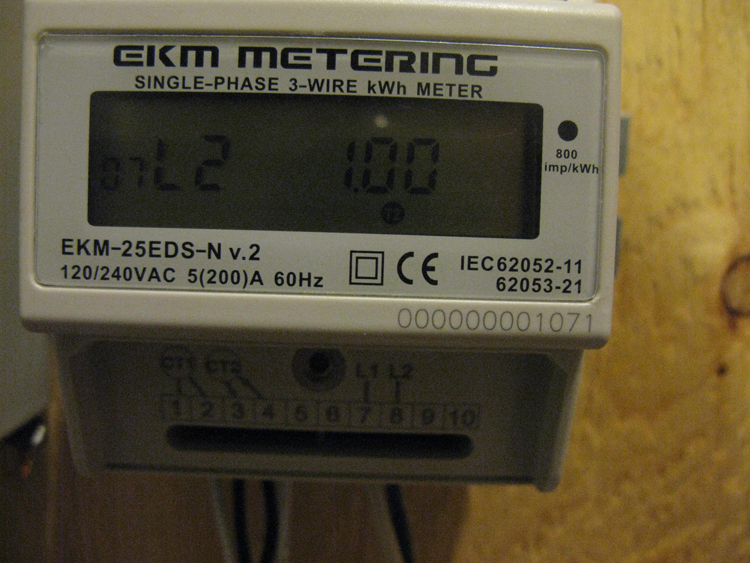
Register 07 - Power Factor
This is the power factor of line2. If you have a 220 volt single circuit, this will be same as register 06. If you are monitoring an entire panel, they will vary because you may have things like a refrigerator between L1 and neutral (a 110V circuit) and only lights between L2 and neutral.
Next: Interfacing the meters to a local area network.
-- end ---